Complete Galaxy Editing in 6 Steps with RawFlow
Introduction
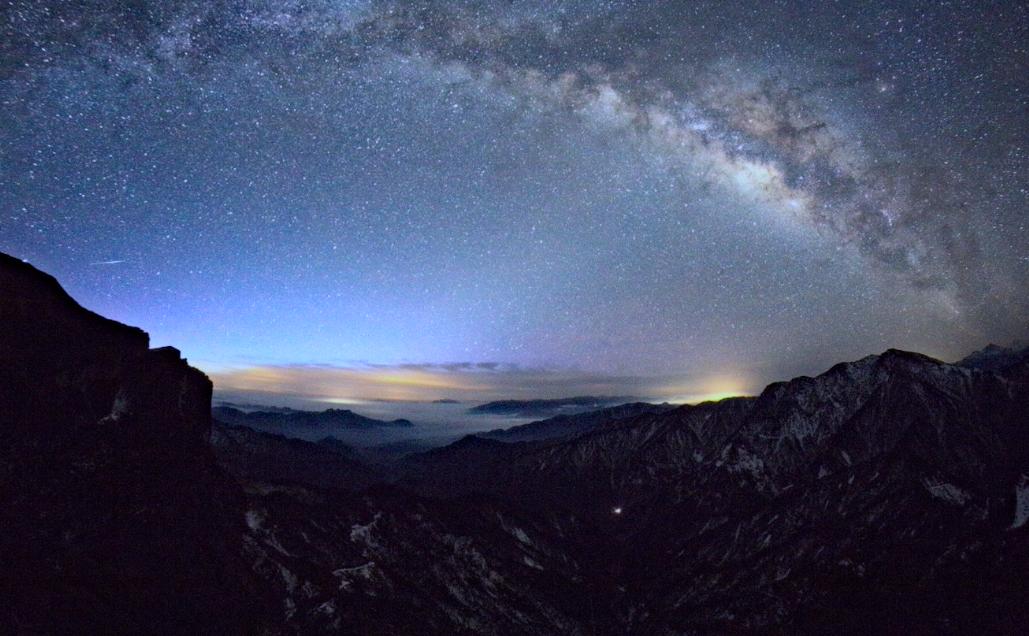
Capturing the Milky Way is one of the most rewarding experiences in astrophotography. However, the raw images often fall short of the breathtaking scenes our eyes witnessed. Color casts, haze, noise, and cluttered star fields can diminish the natural beauty of the galaxy.
In this comprehensive guide, we'll walk you through a complete workflow to transform your galaxy photos using RawFlow — in just 6 simple steps. Whether you're a beginner or an experienced astrophotographer, these techniques will help you achieve professional-quality results.
What You'll Need
Before we begin, make sure you have:
- RawFlow installed on your computer
- A RAW file of the Milky Way or galaxy
- Basic understanding of image editing
Pro Tip: Always work on a copy of your original RAW file to preserve the original data.
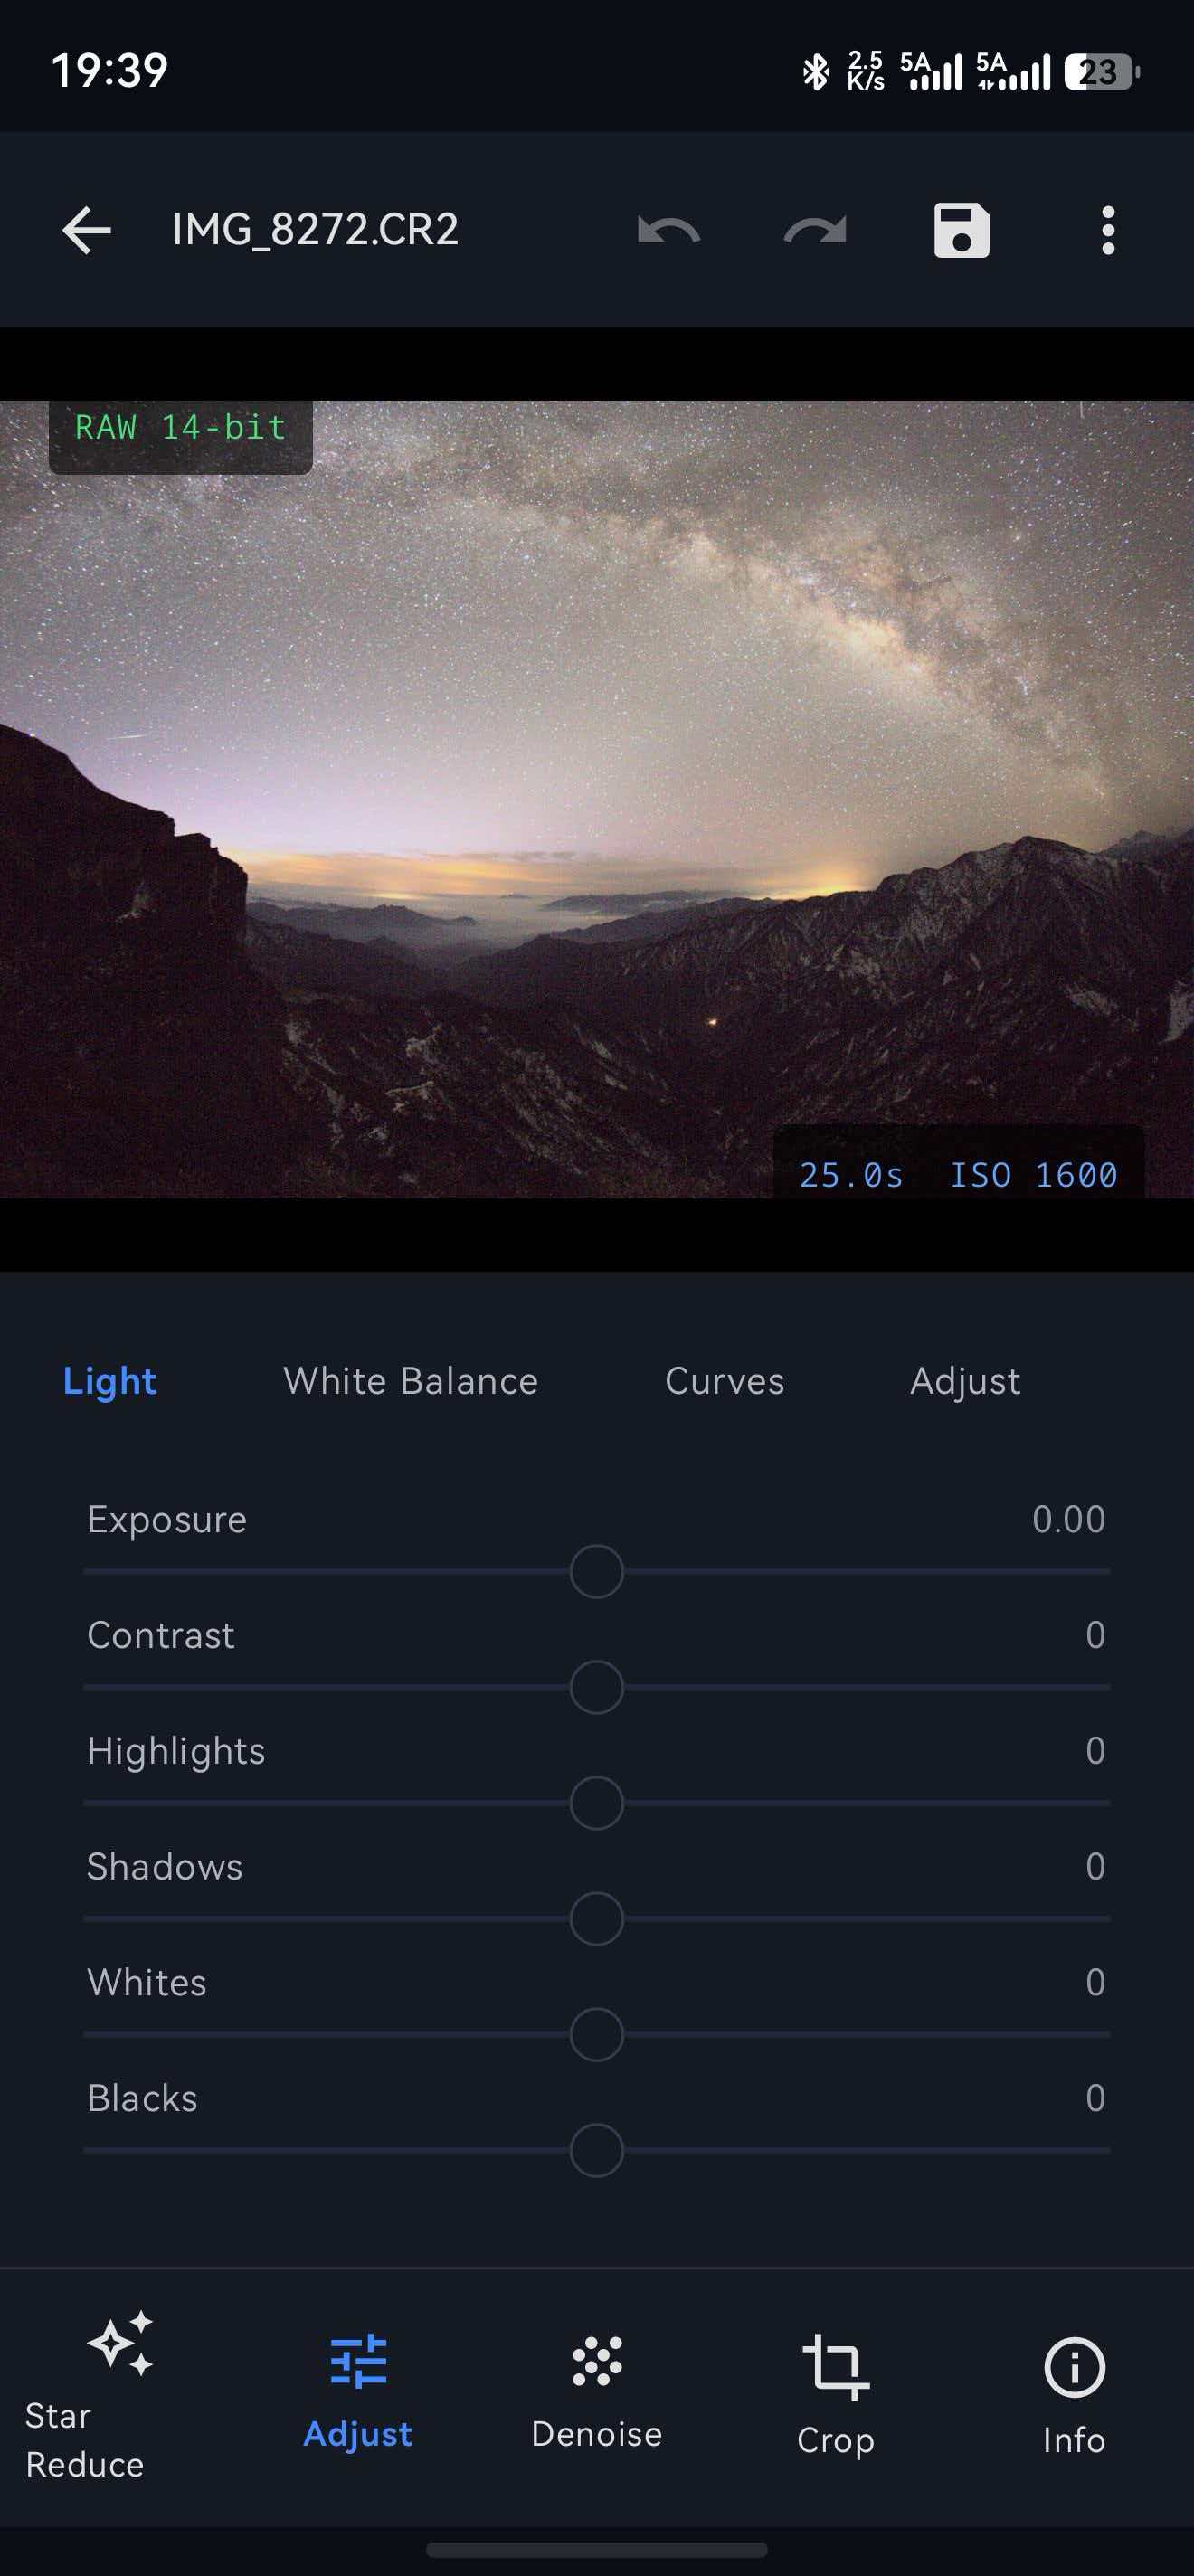
Step 1: Open Your Image and Identify Issues
The journey begins by opening your galaxy photo in RawFlow. The first thing you'll likely notice is a severe white balance problem. Images captured at night often suffer from color casts that make the Milky Way and surrounding environment appear unnatural.
Common white balance issues in astrophotography include:
- Unwanted orange or blue color casts
- Inconsistent color temperature across the frame
- Colors that don't match what your eyes saw
- Hazy or muted Milky Way structure
Don't worry — this is completely normal, and RawFlow has all the tools you need to fix it.
Step 2: Correct White Balance for Natural Colors
Now let's fix that white balance. Navigate to the White Balance panel in RawFlow and adjust the following parameters:
| Parameter | Value |
|---|---|
| Temperature | 3685 |
| Tint | -20 |
These settings will help restore the natural color of the galaxy and environment. The lower temperature removes unwanted warm tones, while the tint adjustment eliminates any green or magenta color casts.
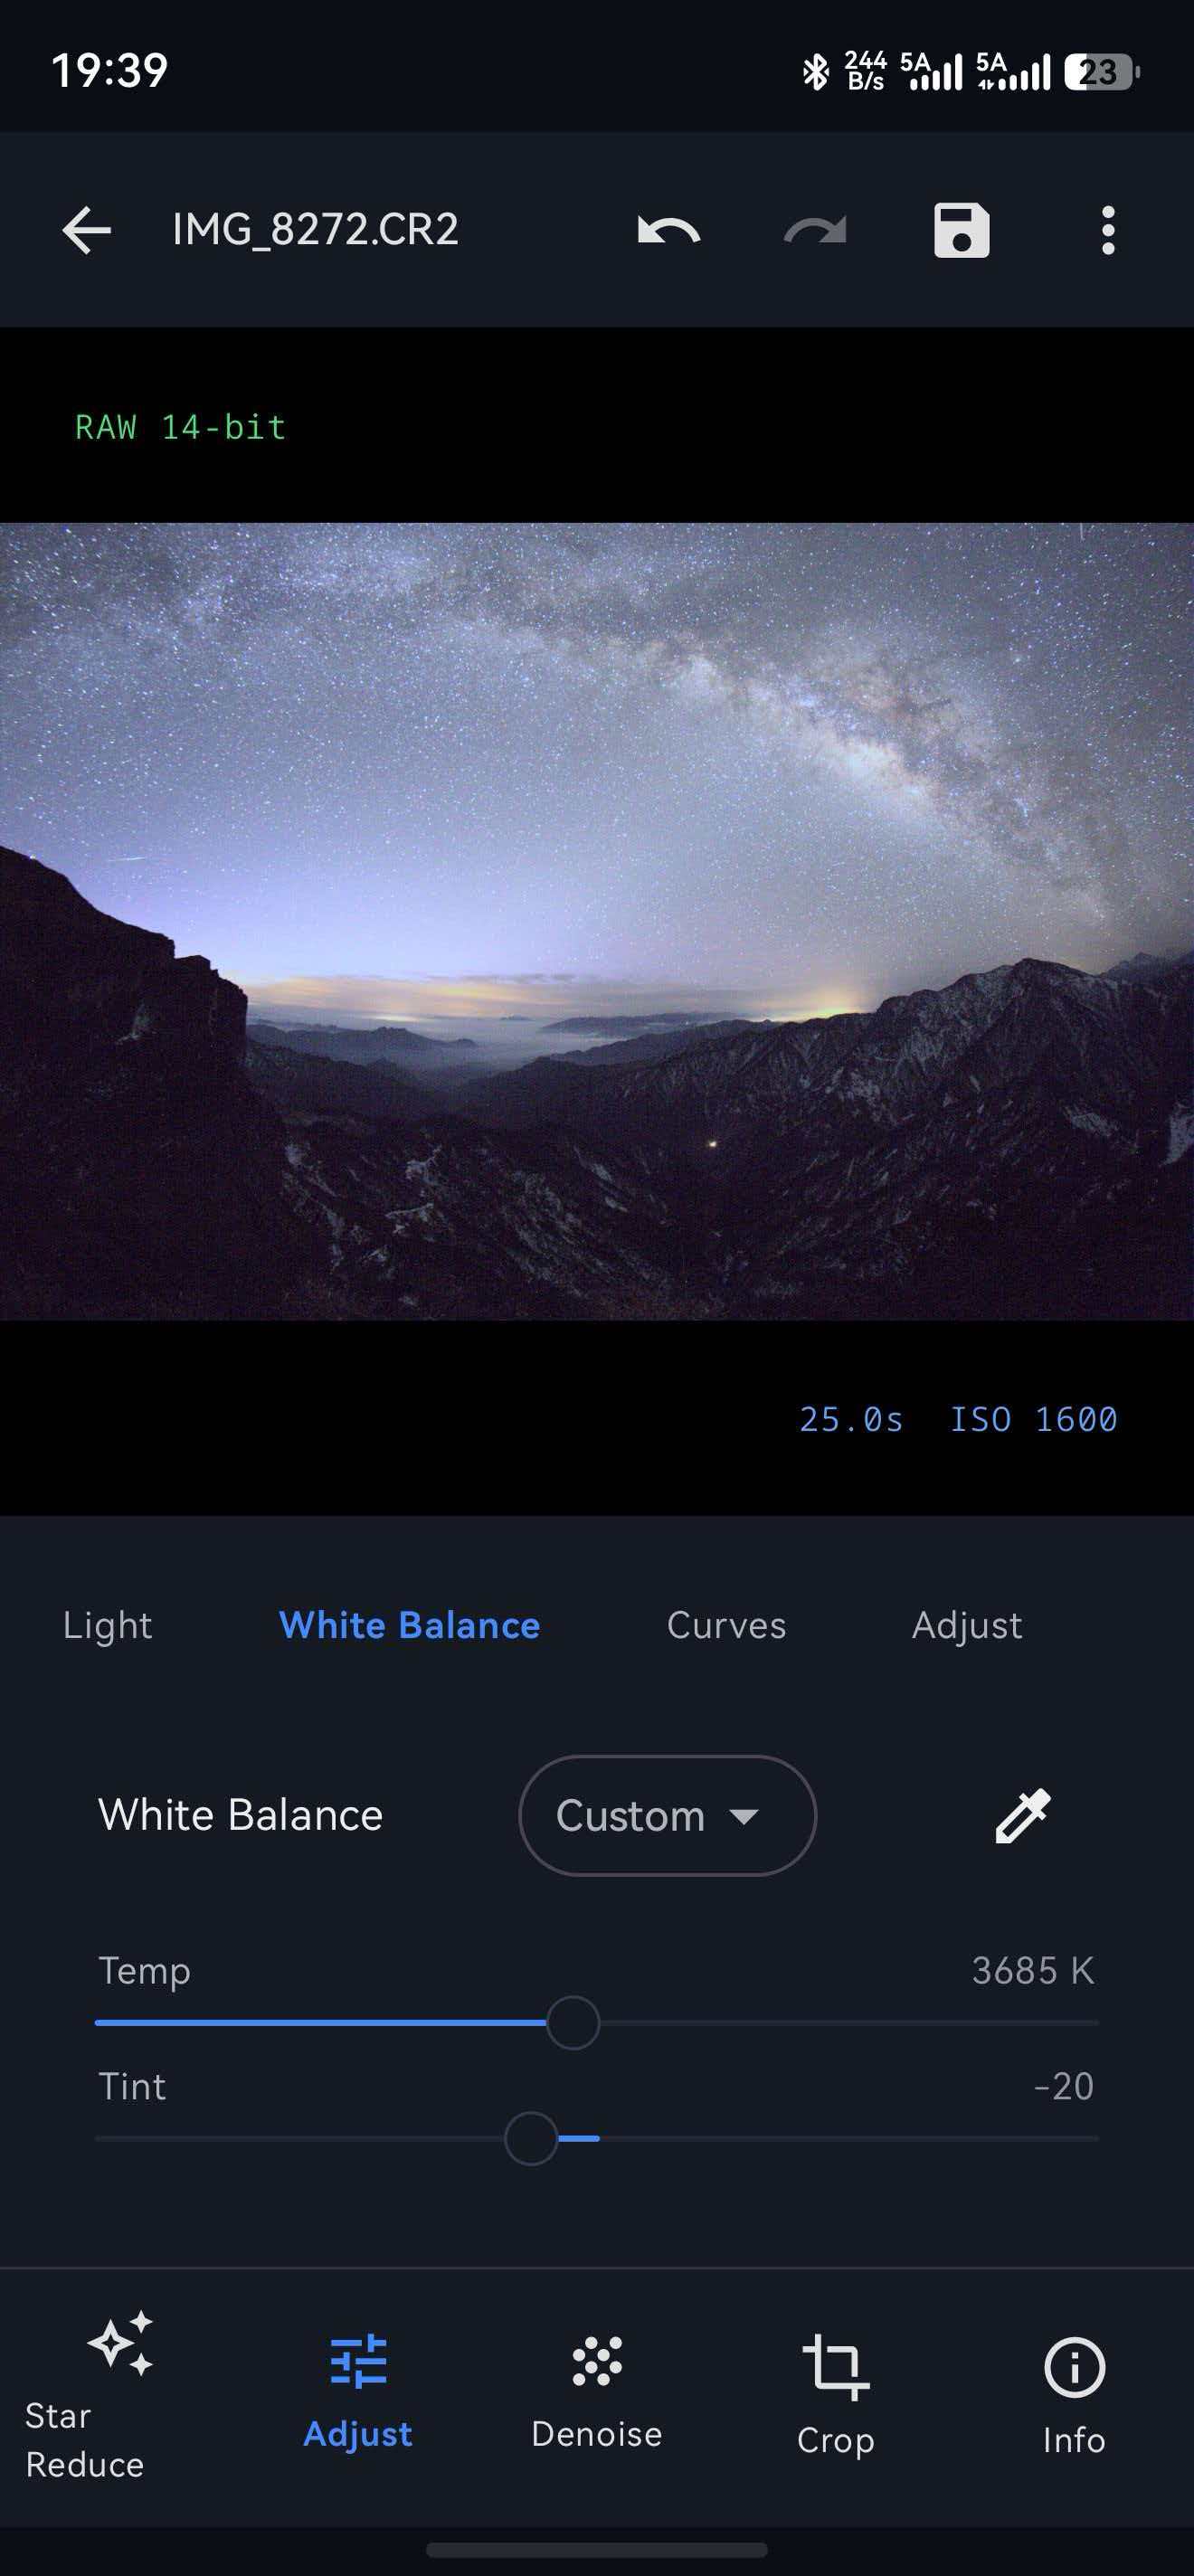
Why 3685K? This temperature closely mimics natural moonlight, which is perfect for Milky Way photography. It preserves the cool blue-purple tones of distant nebulae while maintaining realistic star colors.
Step 3: Adjust Exposure and Contrast
With colors corrected, it's time to enhance the overall brightness and contrast of your image. Navigate to the Light panel and fine-tune the following settings:
| Parameter | Value | Effect |
|---|---|---|
| Exposure | -0.54 | Slight reduction to prevent over-exposure in bright areas |
| Contrast | +7 | Adds depth and dimension to the galaxy structure |
| Shadows | +31 | Reveals hidden details in dark regions |
| Whites | +9 | Brightens the brightest stars without blowing them out |
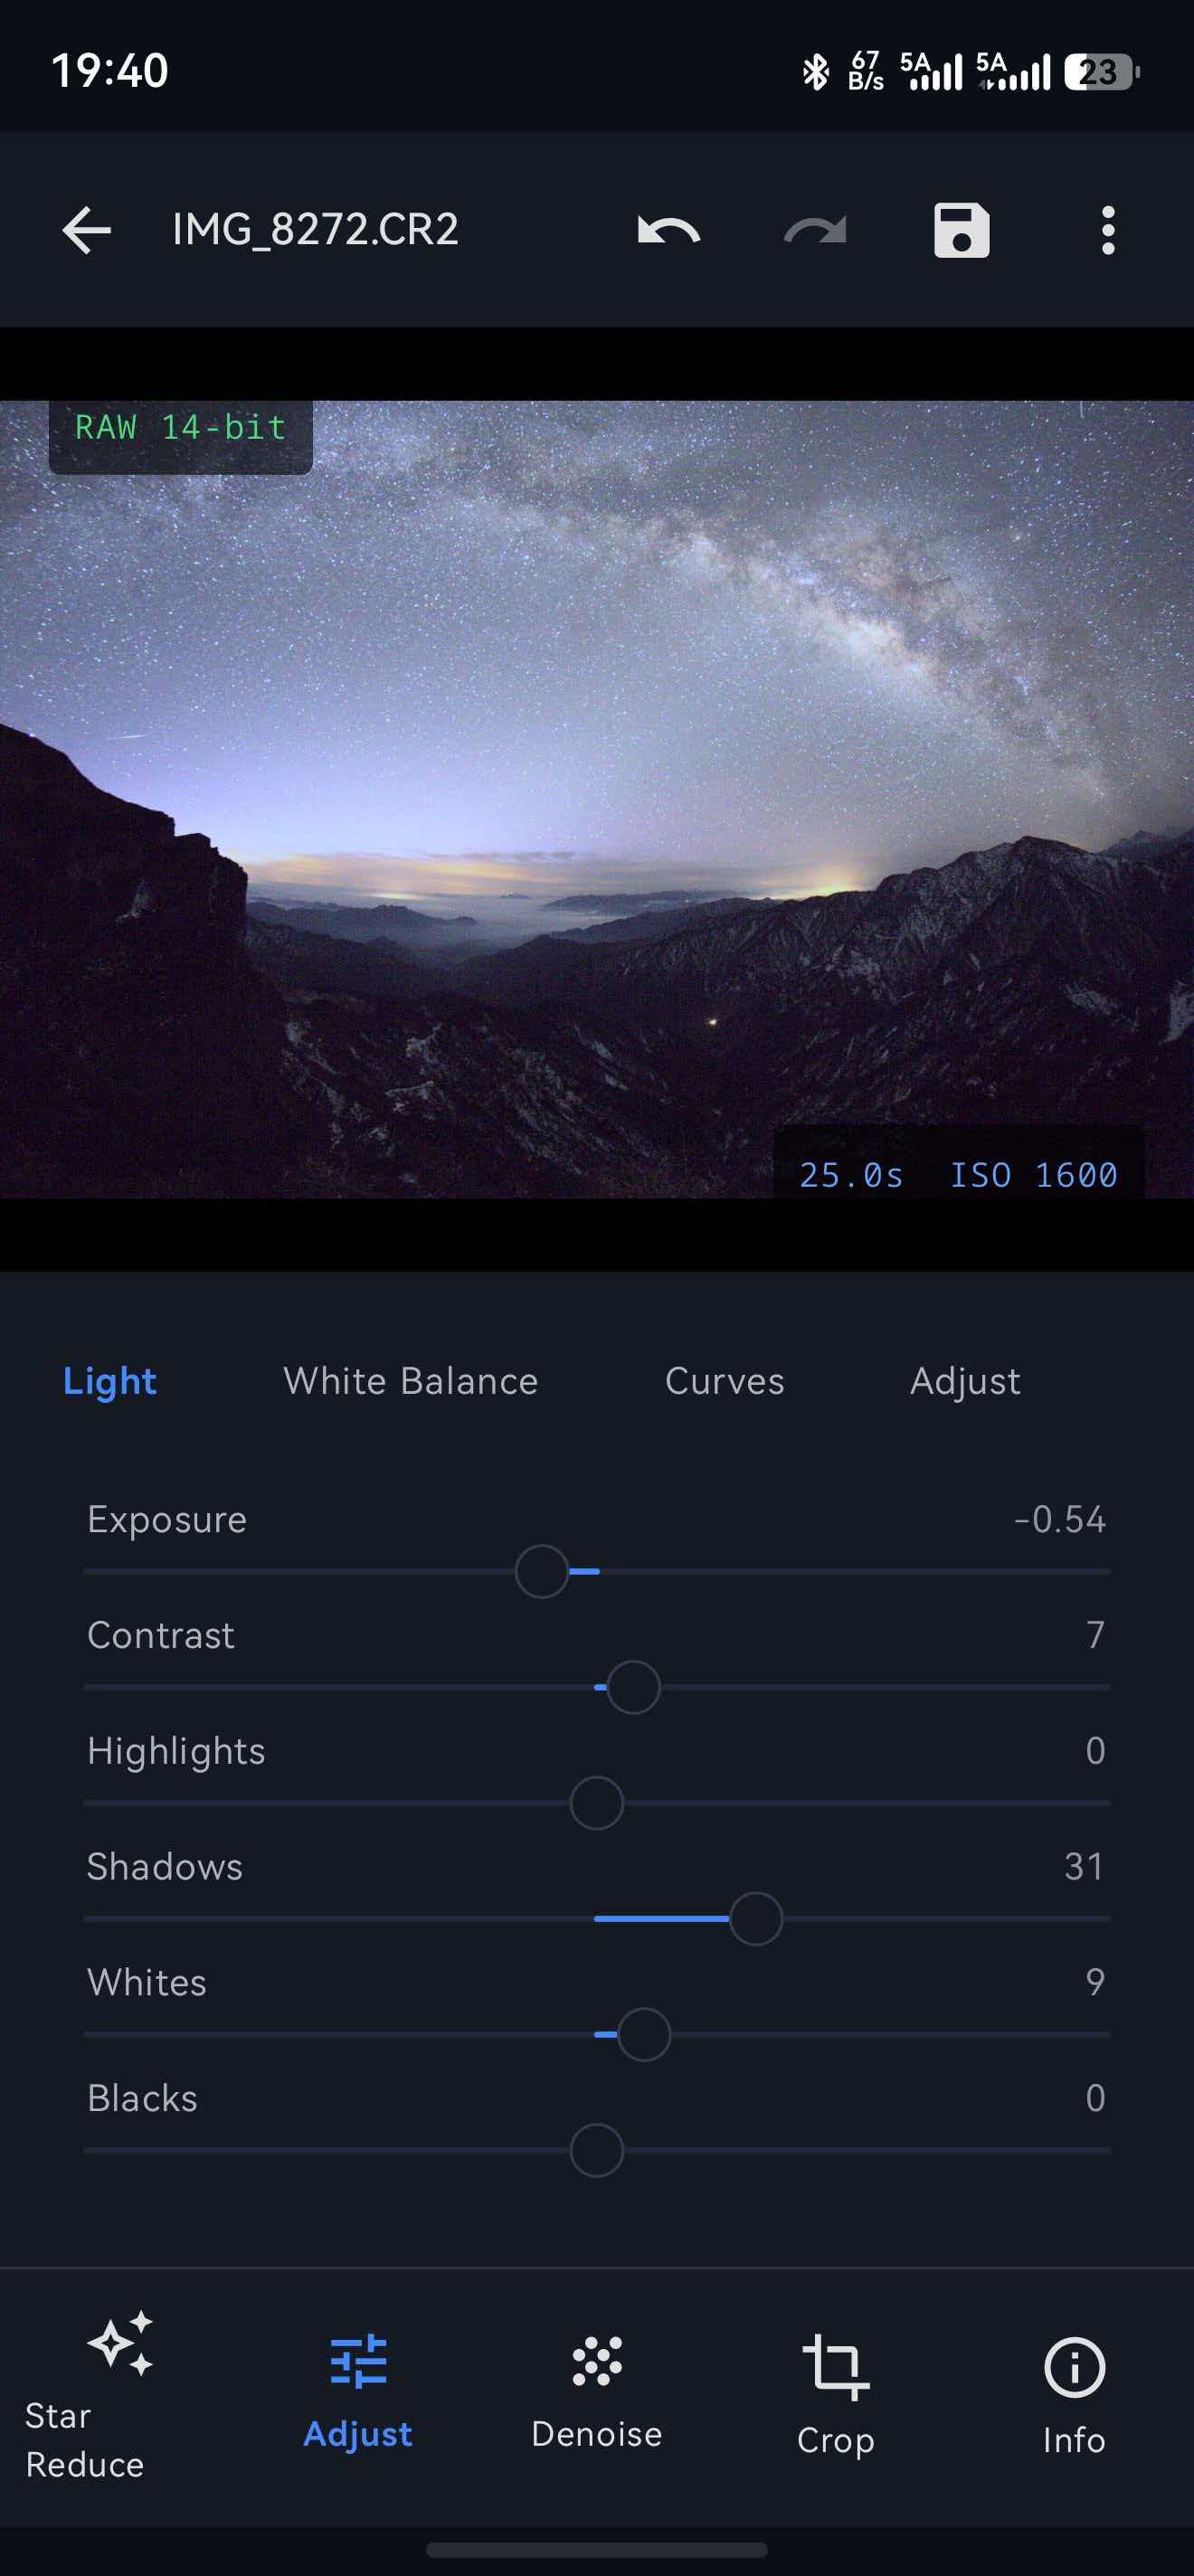
Pro Tip: When adjusting shadows, zoom in on the darker areas of your image to ensure you're not introducing unwanted noise or color artifacts.
Step 4: Remove Atmospheric Haze
Even on clear nights, there's often a thin layer of atmospheric haze that can make your images look foggy or washed out. RawFlow's Dehaze tool is specifically designed to address this issue.
Navigate to the Dehaze panel and set:
| Parameter | Value |
|---|---|
| Dehaze | +51 |
The dehaze slider works by analyzing the image and intelligently removing atmospheric interference. This reveals the true structure of the Milky Way and brings out the faint details in nebulae.
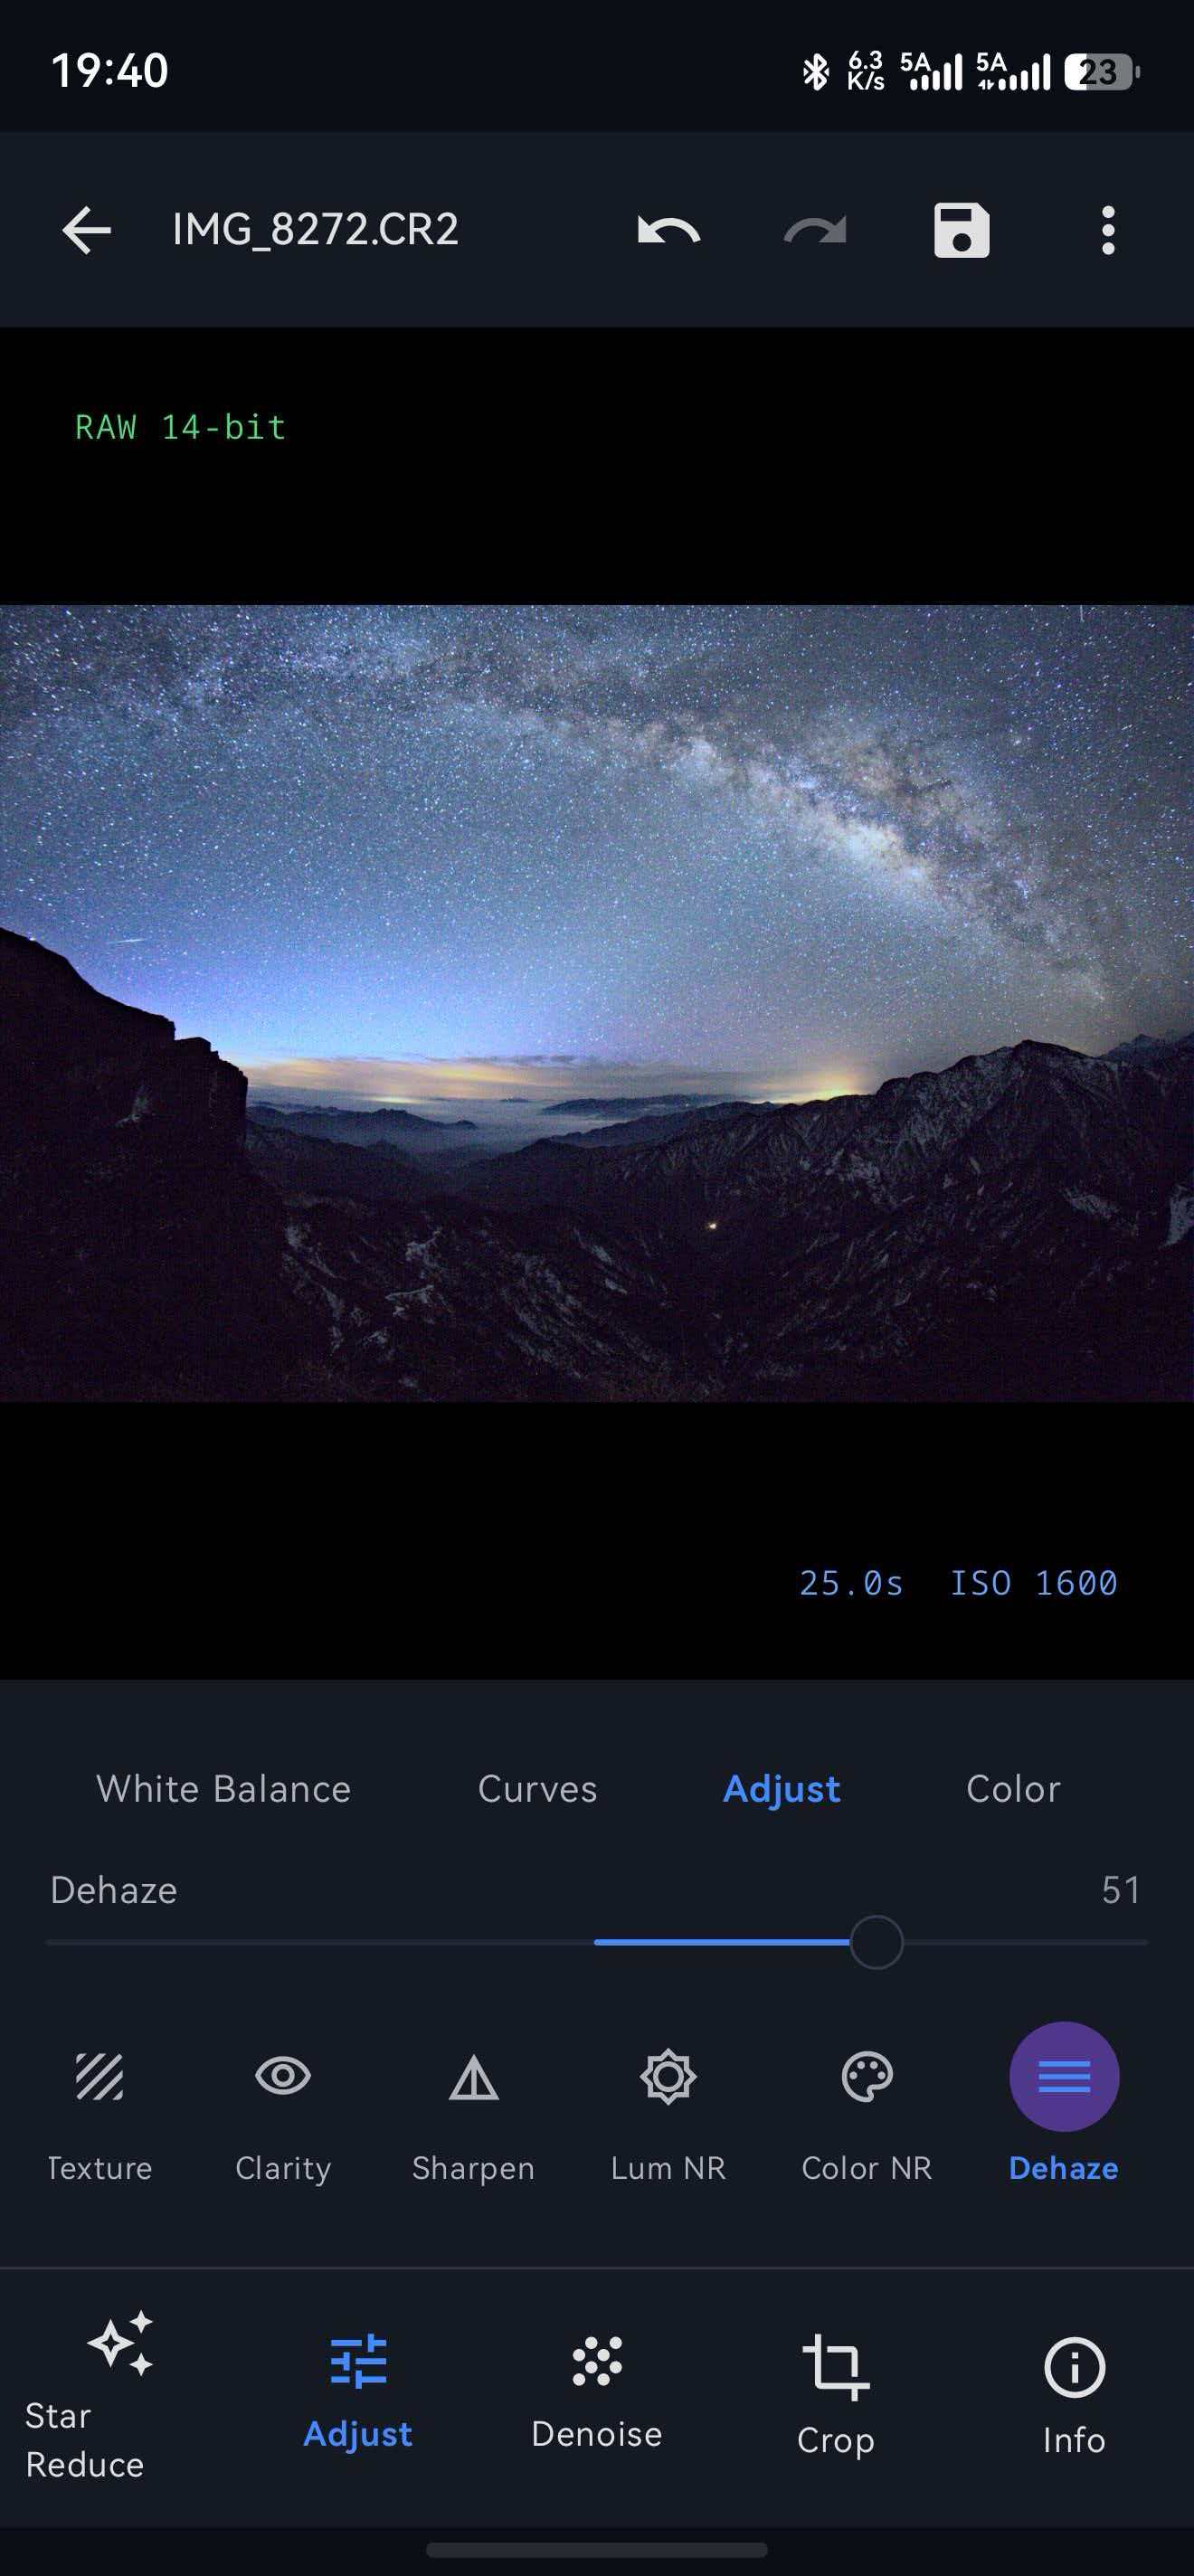
Note: Be careful not to overdo the dehaze effect, as it can introduce artifacts in heavily noise-affected areas. If your image has significant noise, consider applying noise reduction first before using dehaze.
Step 5: Reduce Noise While Preserving Stars
Night sky photography often introduces unwanted noise, especially when shooting at higher ISOs. RawFlow features a powerful dedicated star noise reduction function that's specifically calibrated for astrophotography.
Navigate to the Noise Reduction panel and apply the appropriate noise reduction settings. RawFlow's specialized algorithm:
- ✅ Preserves star detail while reducing background noise
- ✅ Maintains color information in nebulae and galaxies
- ✅ Works intelligently with different noise patterns
- ✅ Provides customizable settings for different levels of noise
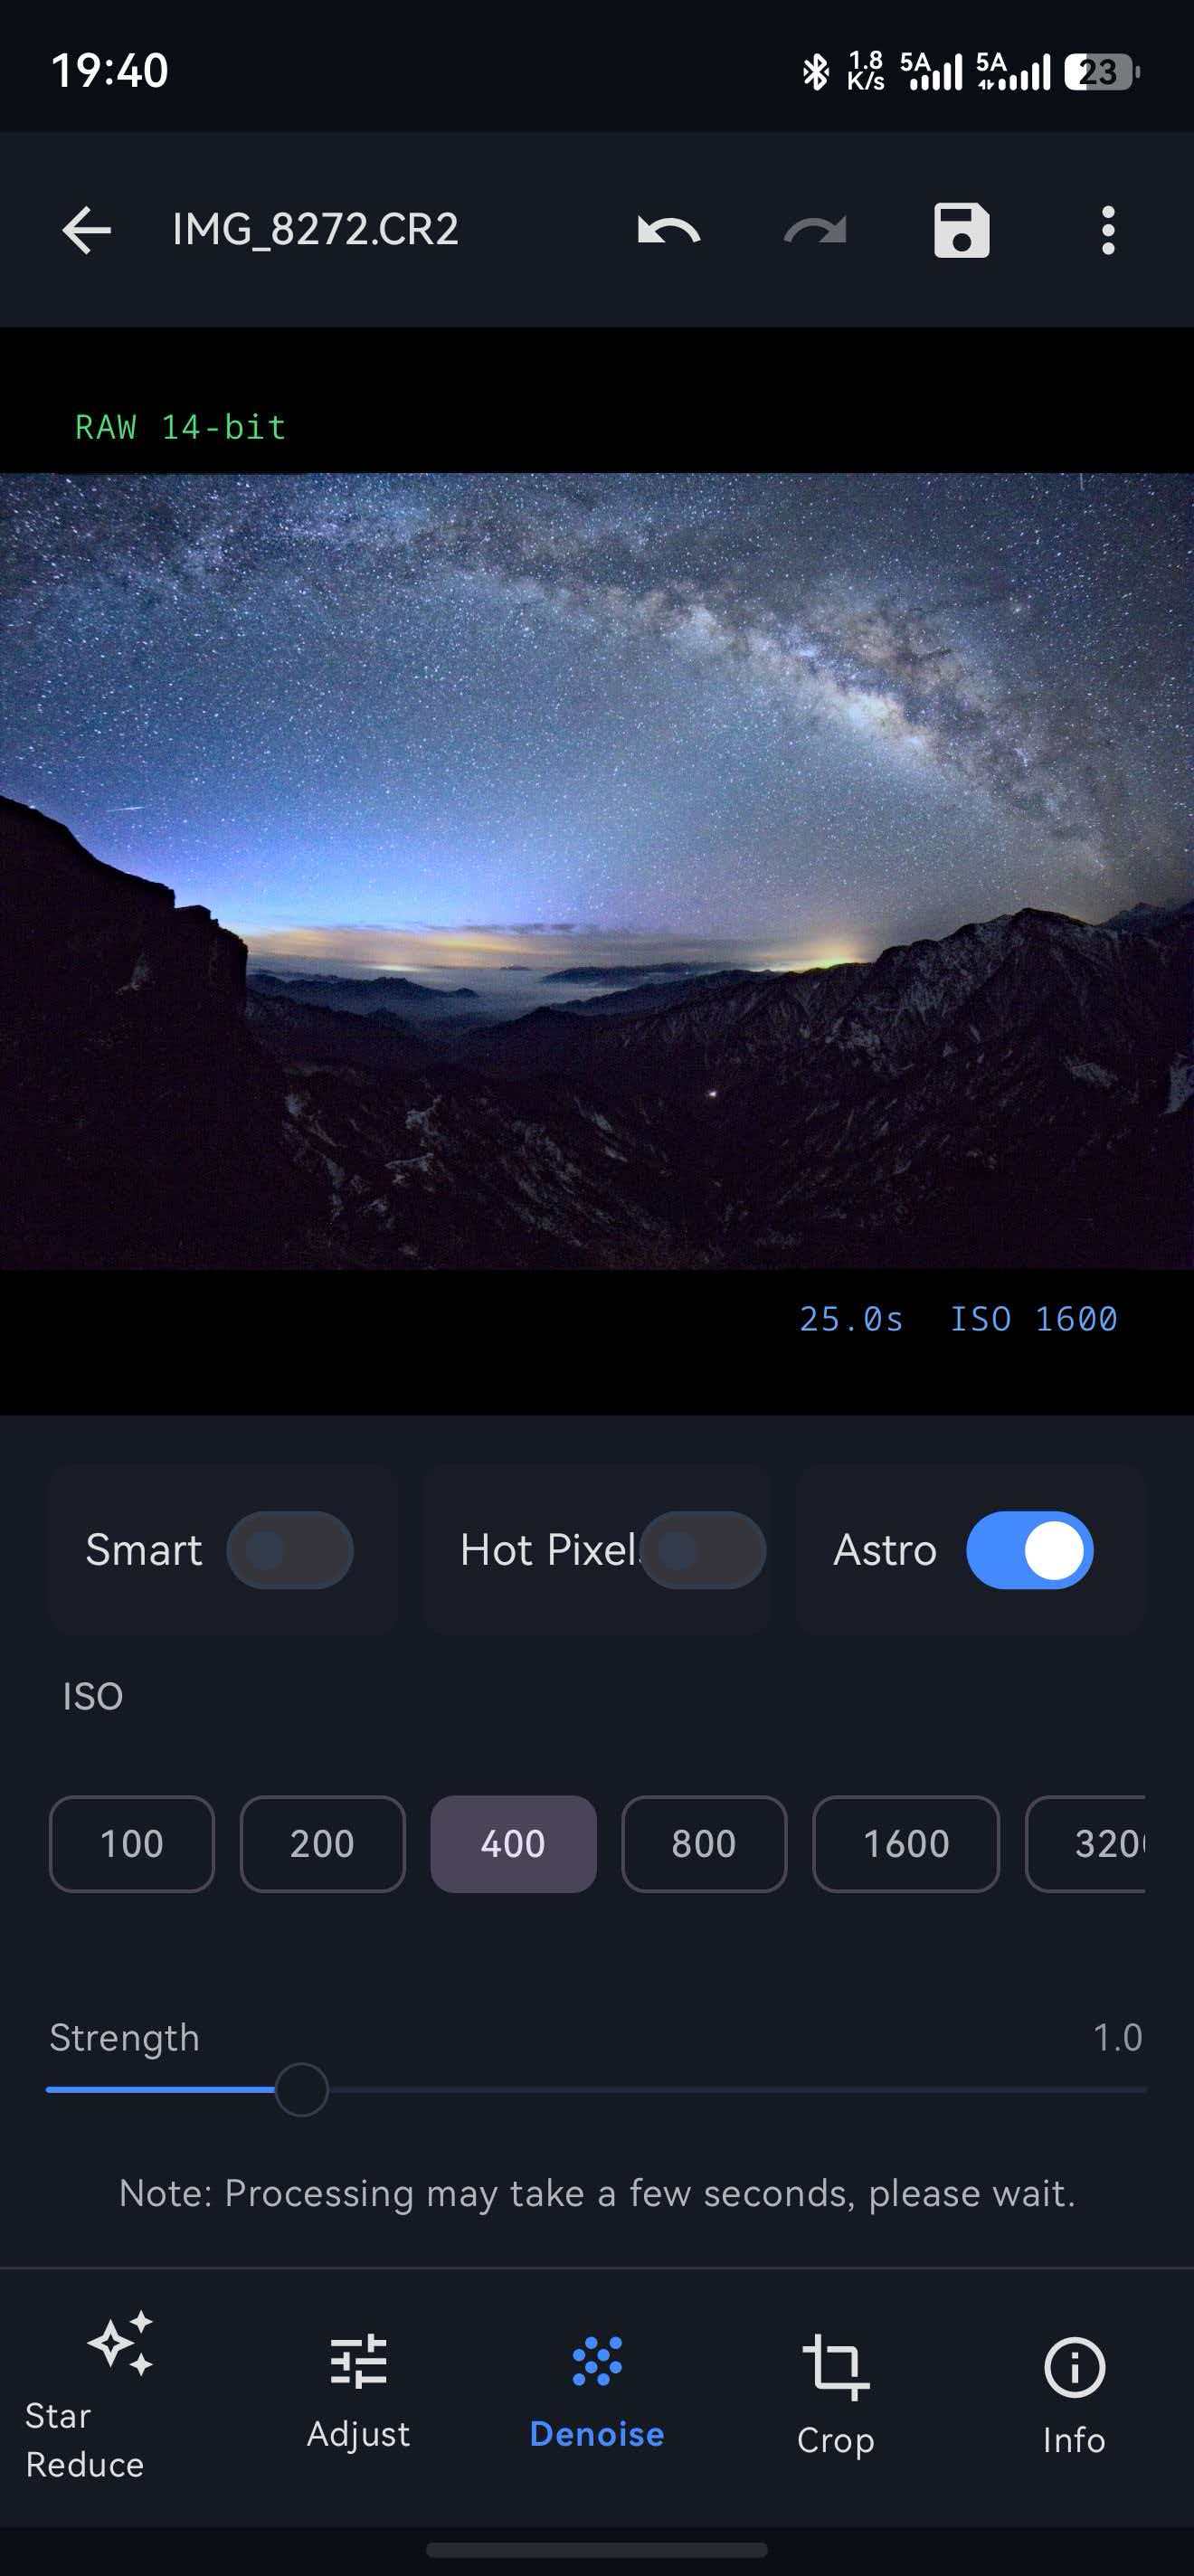
Why Dedicated Star Noise Reduction? Standard noise reduction tools often blur stars or remove small ones. RawFlow's specialized algorithm understands the difference between noise and actual stars, ensuring your galaxy remains crisp and detailed.
Step 6: Reduce Star Density for a Cleaner Milky Way
After all adjustments, you might notice that the sky is filled with too many stars, making the Milky Way less prominent. This is where RawFlow's one-click Star Reduction feature comes in.
Navigate to the Star Reduction panel and adjust:
| Parameter | Value |
|---|---|
| Star Reduction | 0.7 |
The star reduction tool intelligently analyzes star sizes and brightness, reducing smaller, less prominent stars while preserving the larger, more important ones. This creates a cleaner, more dramatic Milky Way appearance.
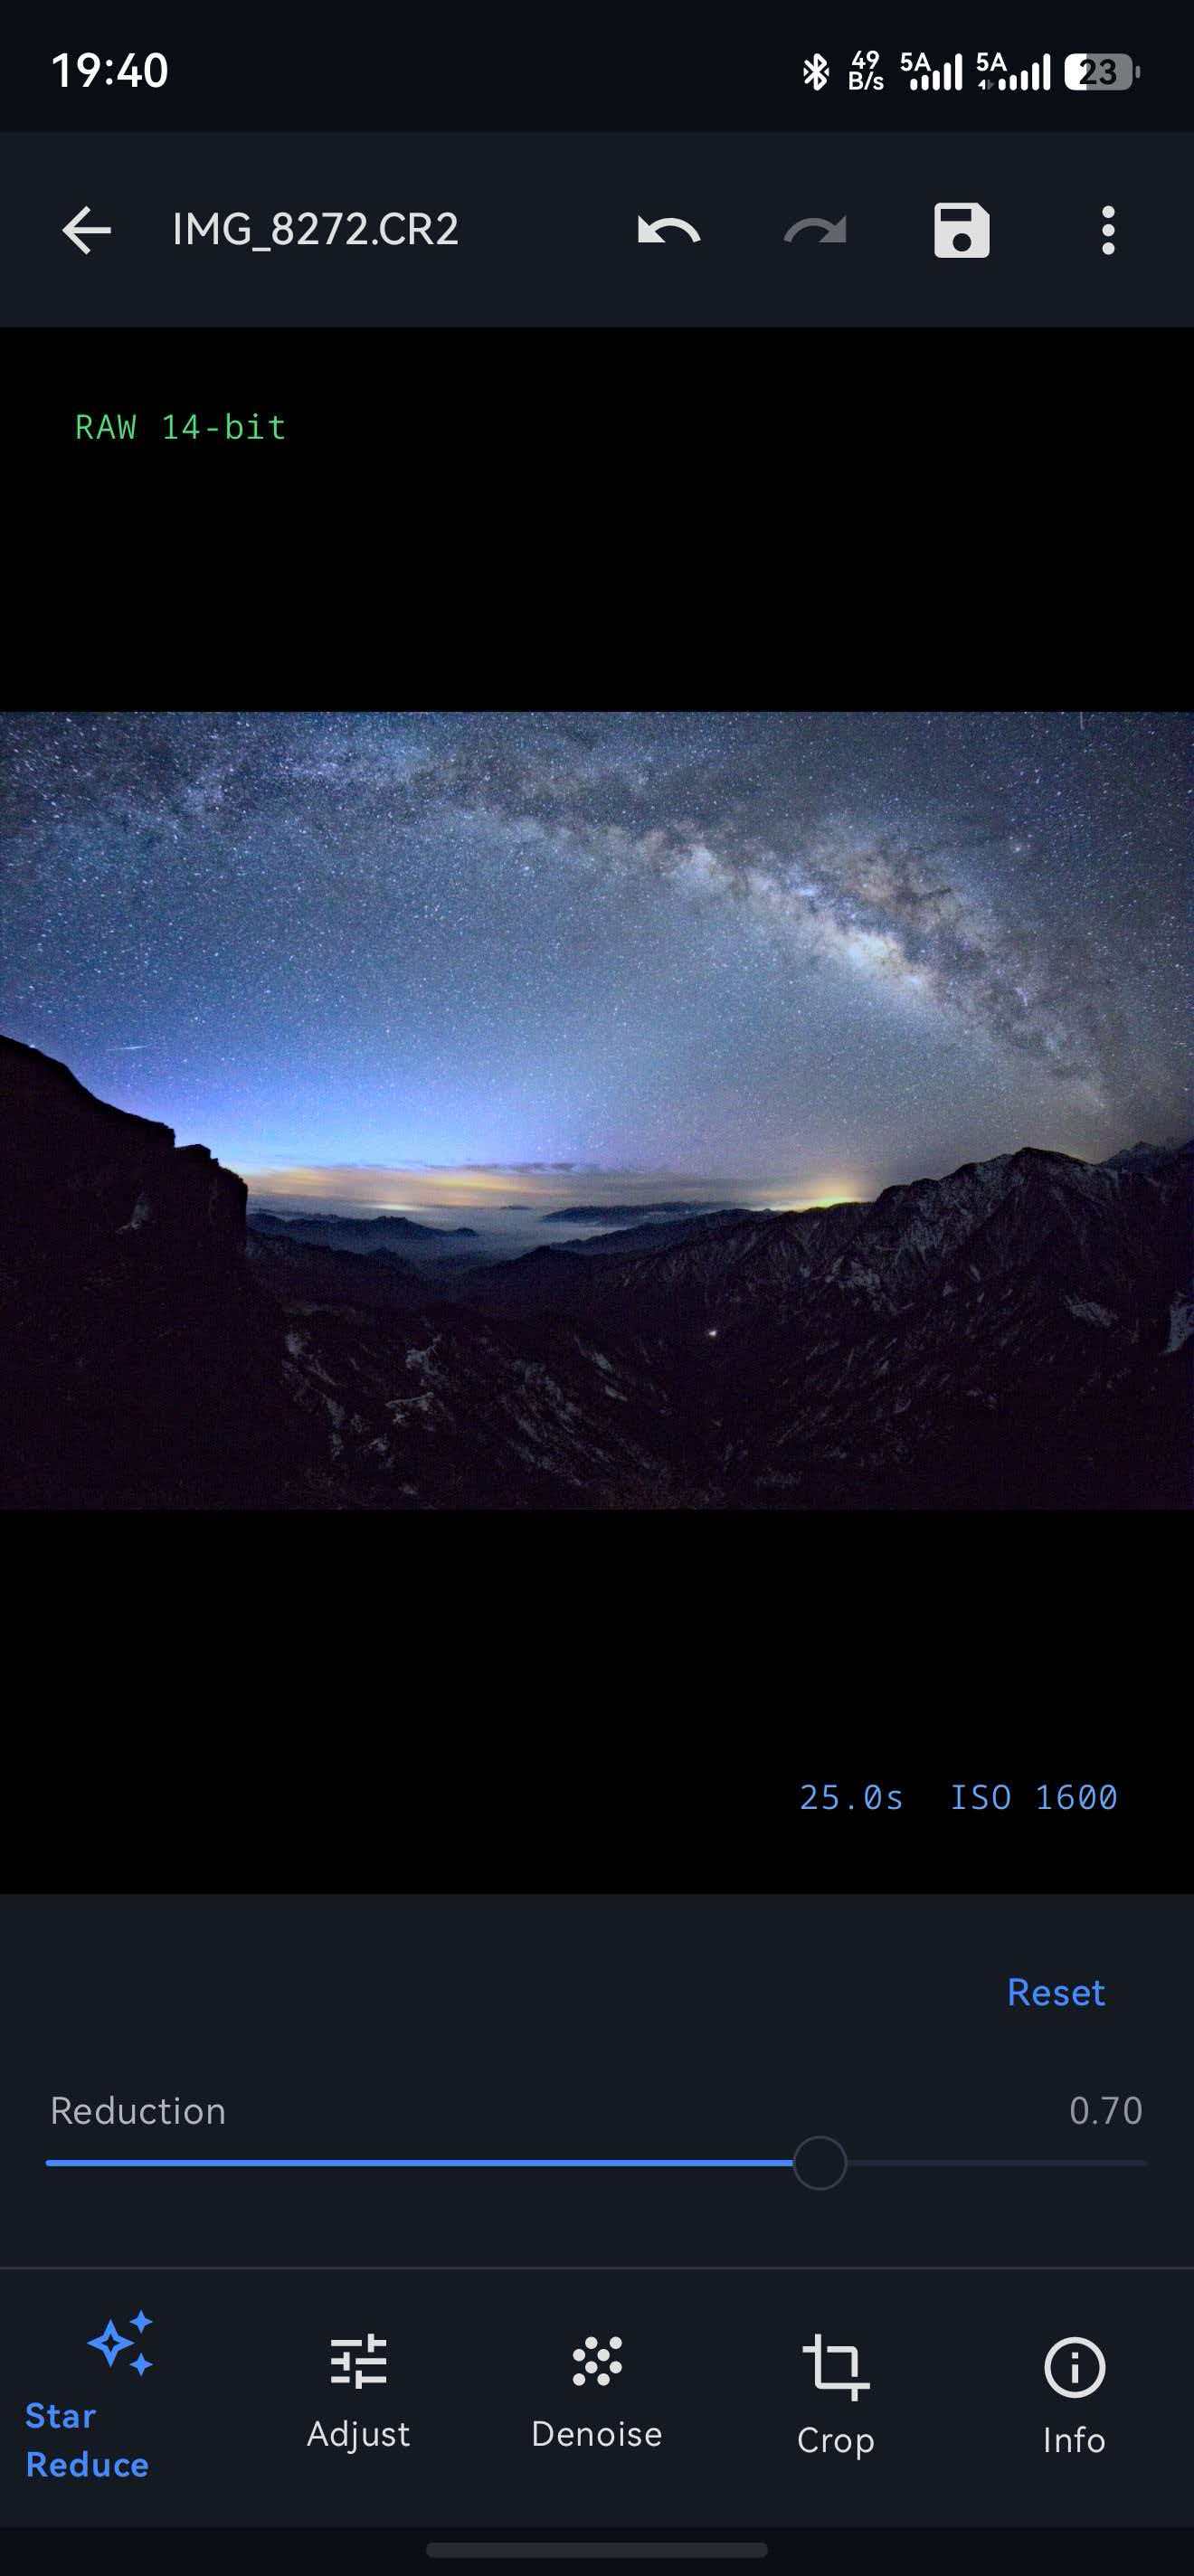
Customization Tip: The star reduction slider is fully adjustable. If you want to keep more stars for a star-rich look, lower the value. For a cleaner, more nebula-focused image, increase it. Find the balance that works best for your artistic vision.
Final Result: A Stunning Milky Way
After completing all 6 steps, your galaxy photo should now feature:
- ✅ Natural, accurate colors with corrected white balance
- ✅ Balanced exposure with proper highlights and shadows
- ✅ Crisp, haze-free Milky Way structure
- ✅ Clean, noise-free background sky
- ✅ Well-defined galaxy with reduced star clutter
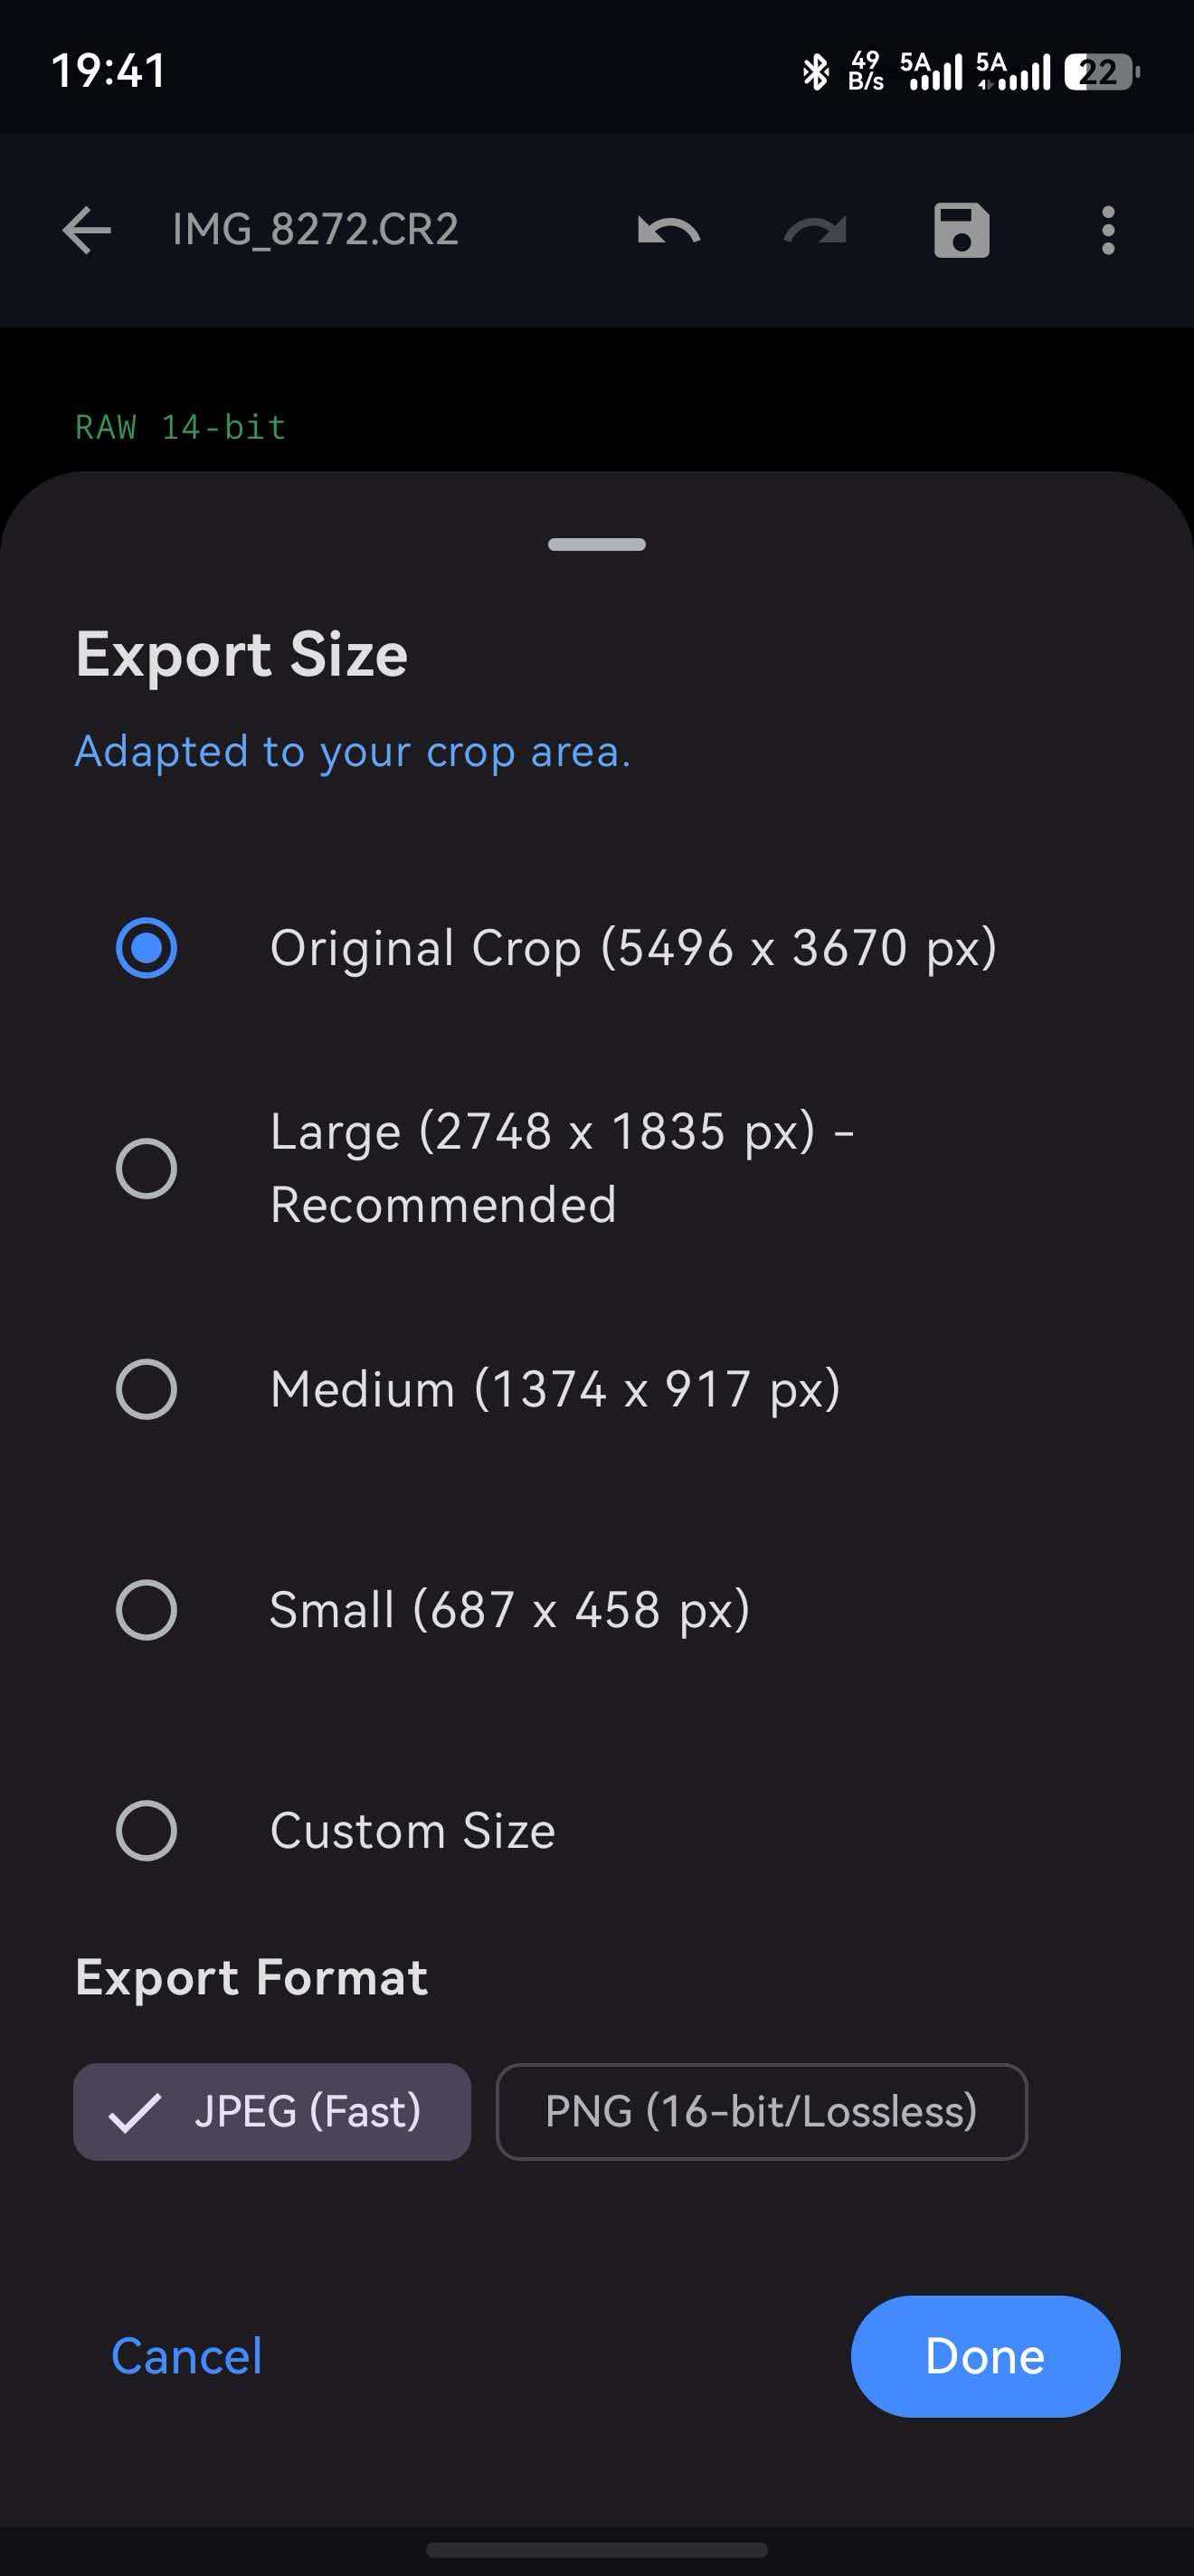
Exporting Your Masterpiece
One of RawFlow's standout features is its flexible export options. Depending on your intended use, you can export in various formats and sizes:
| Format | Use Case |
|---|---|
| 8K RAW | Maximum quality for large prints |
| 16-bit TIFF | Professional editing in other software |
| Optimized JPEG/PNG | Social media and web sharing |
RawFlow supports exporting up to 8K resolution, ensuring your astrophotography work looks stunning whether displayed on a website or printed as a large poster.
Conclusion
Editing galaxy photos doesn't have to be complicated. With RawFlow's powerful tools and this simple 6-step workflow, you can transform challenging RAW captures into stunning Milky Way images that capture the true beauty of the night sky.
Remember the workflow:
- Open and assess white balance issues
- Correct white balance for natural colors
- Fine-tune exposure and contrast
- Remove atmospheric haze
- Apply dedicated noise reduction
- Reduce star density for a cleaner galaxy
Ready to transform your galaxy photos? Download RawFlow today and start creating stunning astrophotography!
Have questions about this tutorial? Feel free to leave a comment below. Happy shooting!